Free Motion Friday - Ribbon Candy Corners
 It's been one of those weeks. I do still have a couple quilts in the line up to go, but I just couldn't make myself work that hard :D I am getting low on quilts though, so remember, if you want your quilt to be part of Free Motion Friday, email a picture of it to kathleen(at)kathleenquilts.com or tag it #freemotionfriday on instagram.
So my mom was working on a quilt this week for my Granny, and she was doing some ribbon candy that had to do a corner. And as any one who has read this blog knows, I have mad love for ribbon candy. So she asked me. Then a few of the other quilting ladies chimed in that they'd like to know how I did it to, so here it is.
I usually do it in one of three ways.
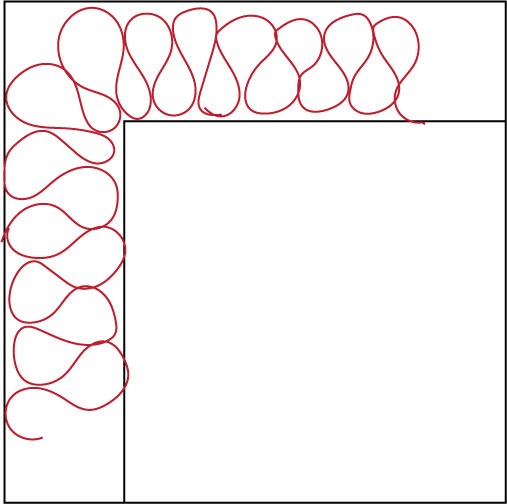 The first way is shown above. As I get to the corner I slowly make the inside bubble smaller and the outer bubble bigger until it goes around the corner.
 In the second method I made one big bubble to get around the corner.
These first two methods I tend to use interchangeably. I'm pretty lazy, so as I come to the corner, depending where in the loop I am, then I pick which way I'm going.
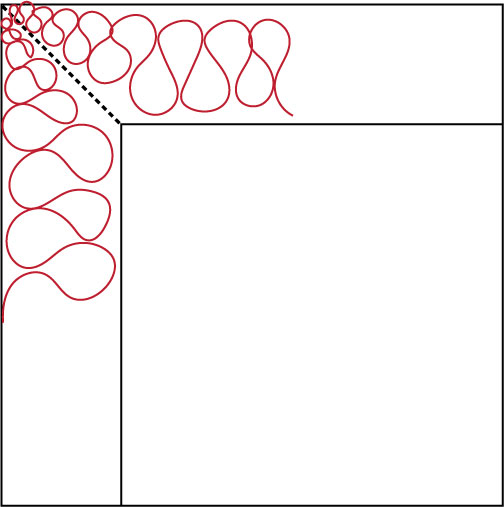 In the 3rd method, I imagine a diagonal line through the corner, then make my ribbon candy smaller as I come to the corner, and then larger coming out. This method works best in slightly larger ribbon candy -- usually 2" or bigger is a good rule.
Anyways, once AGAIN, remember to email pictures of your quilt to kathleen(at)kathleenquilts.com or tag them #freemotionfriday on instagram so that I can play with them! I have so much fun, and LOVE seeing your quilts.
Later days! Kathleen.