Free Motion Friday - Delectable, Indelible
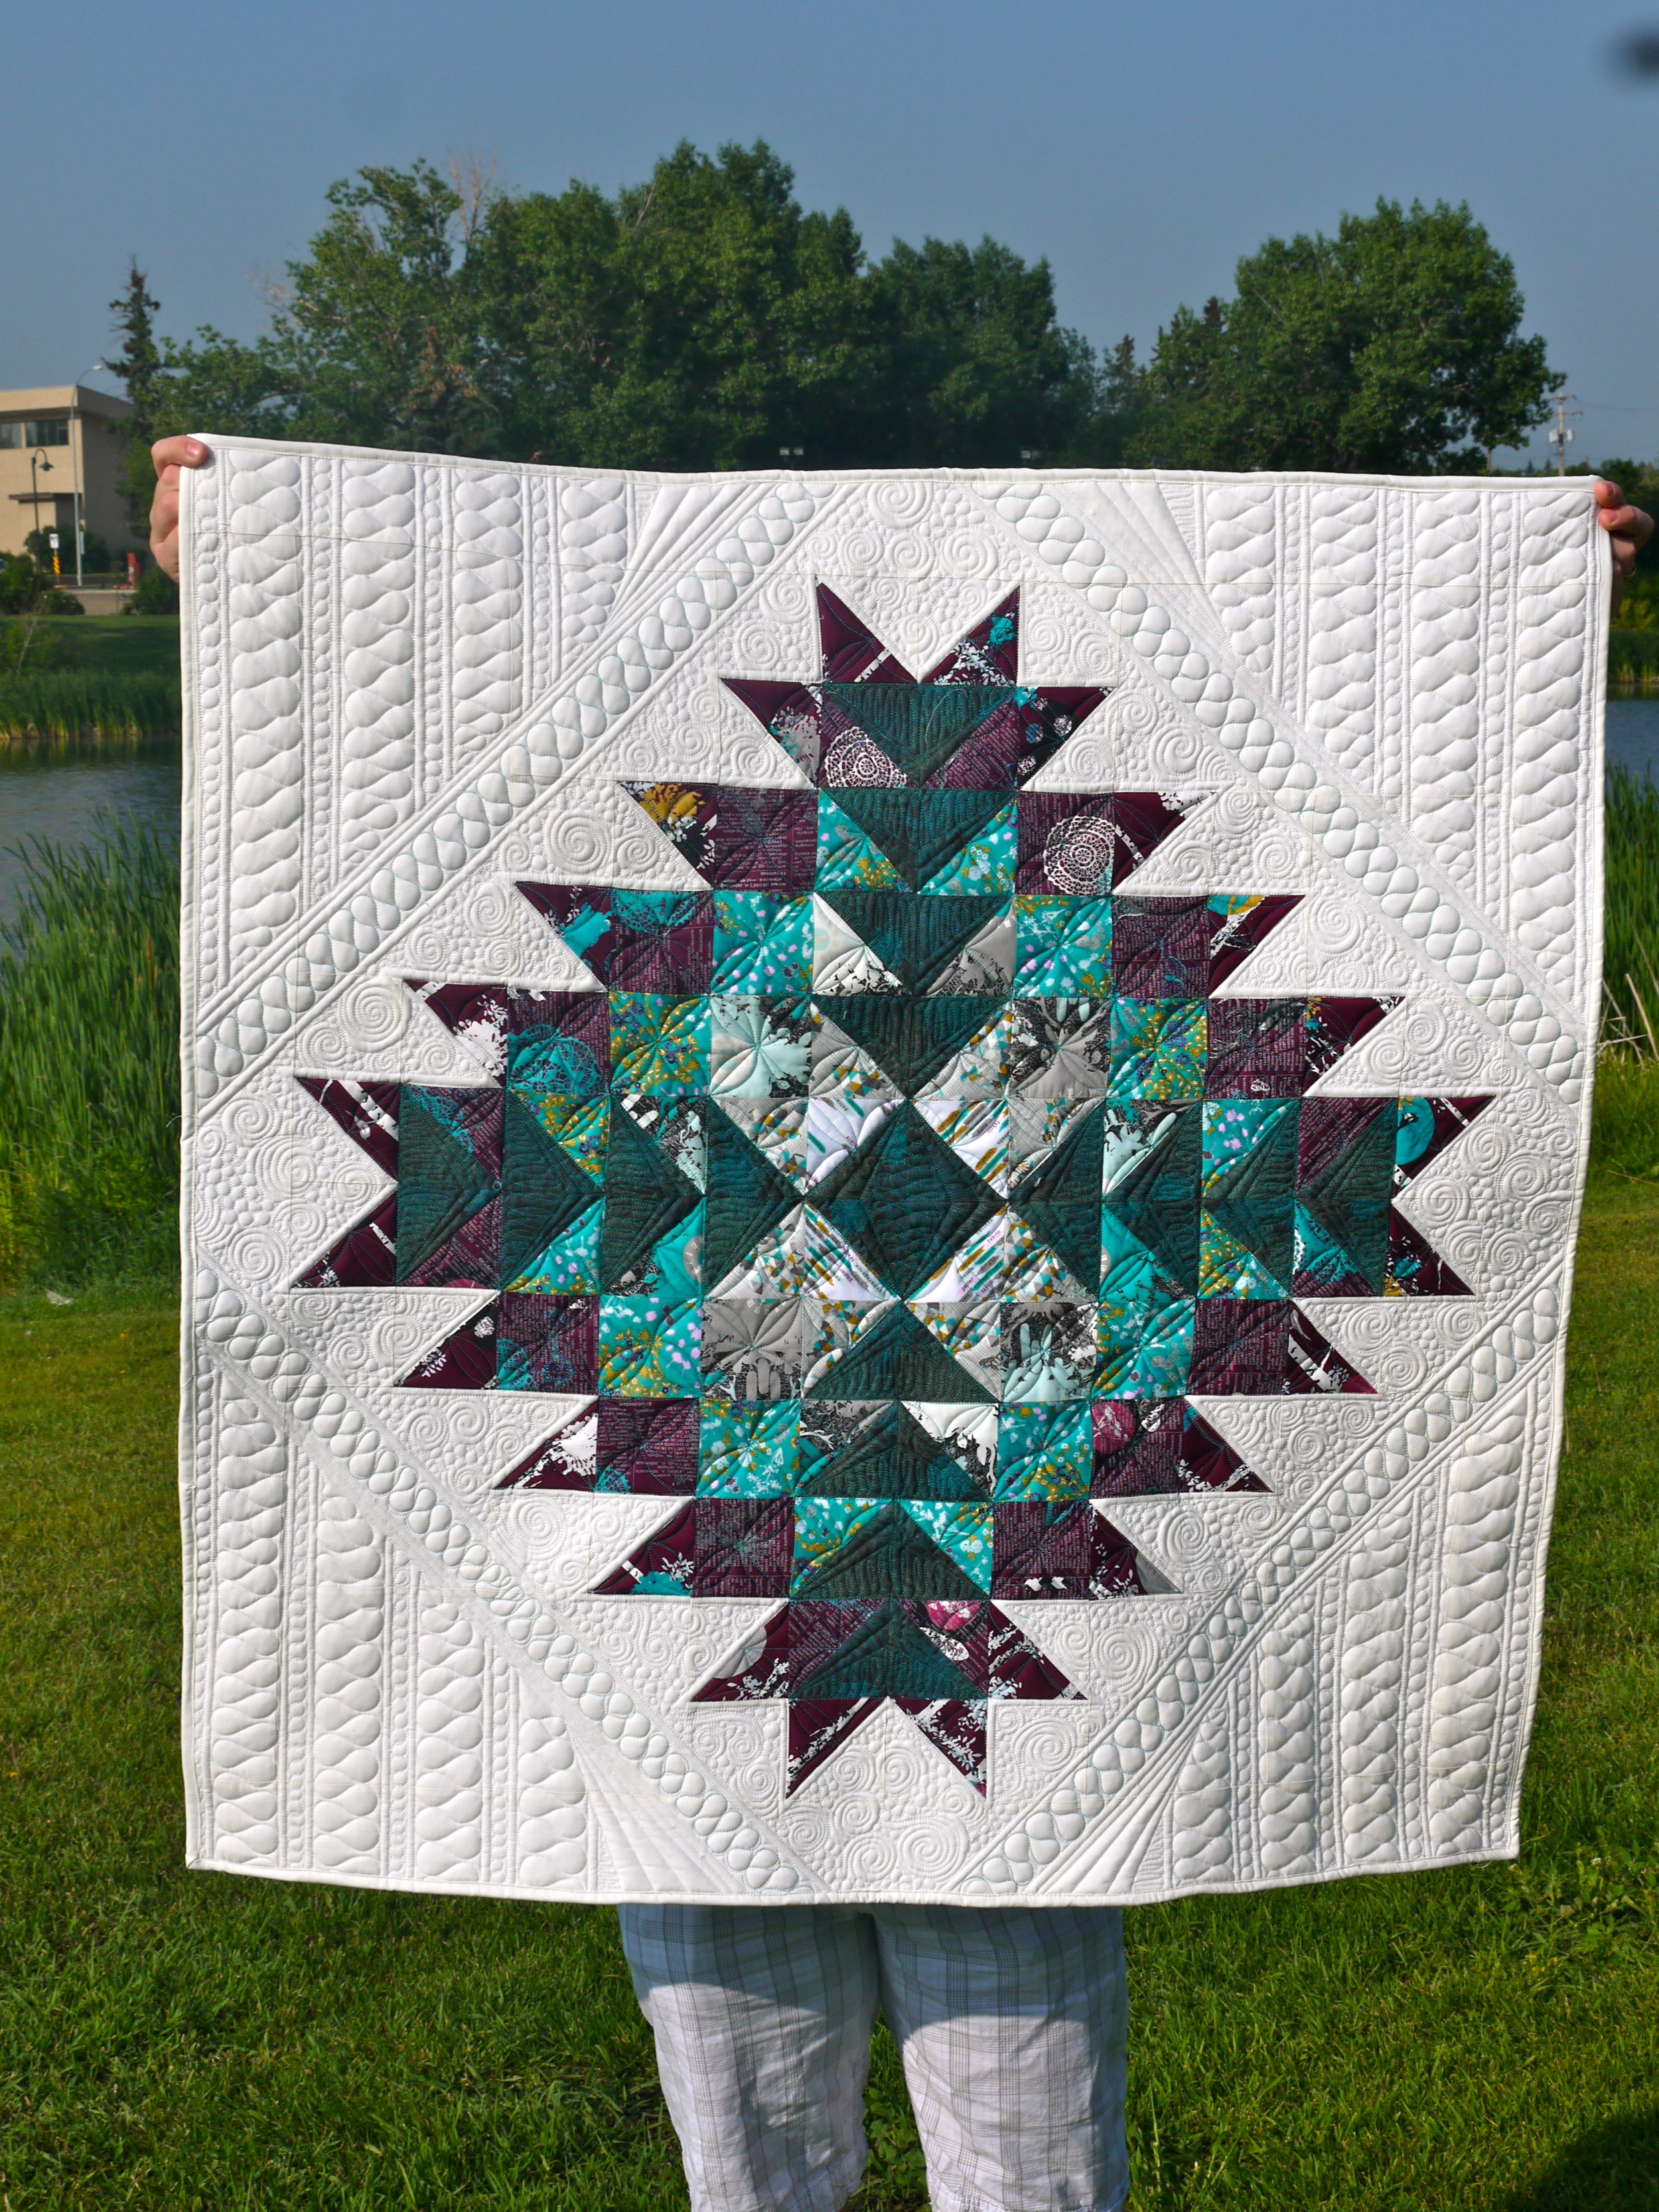
Almost every time I finish quilting a quilt, I think to myself "man Kathleen, you really outdid yourself this time" And every time I think "It's going to be hard to do better than this next time"... and with this quilt, I once again thought that. You can see more pictures of my Indelible, Delectable quilt as well as get the free pattern by reading my blog hop post here. I love this quilt so much. Dad has it right now at Quilting From The Heart, and I really need to get it back :D This quilt actually has 4 layers of batting in it, mainly because I had planned to use a layer of cotton and a layer of poly, but the quilt was small and the batting wide, so I folded the batting in half mainly to avoid wasting batting.
So, how did I quilt this one?
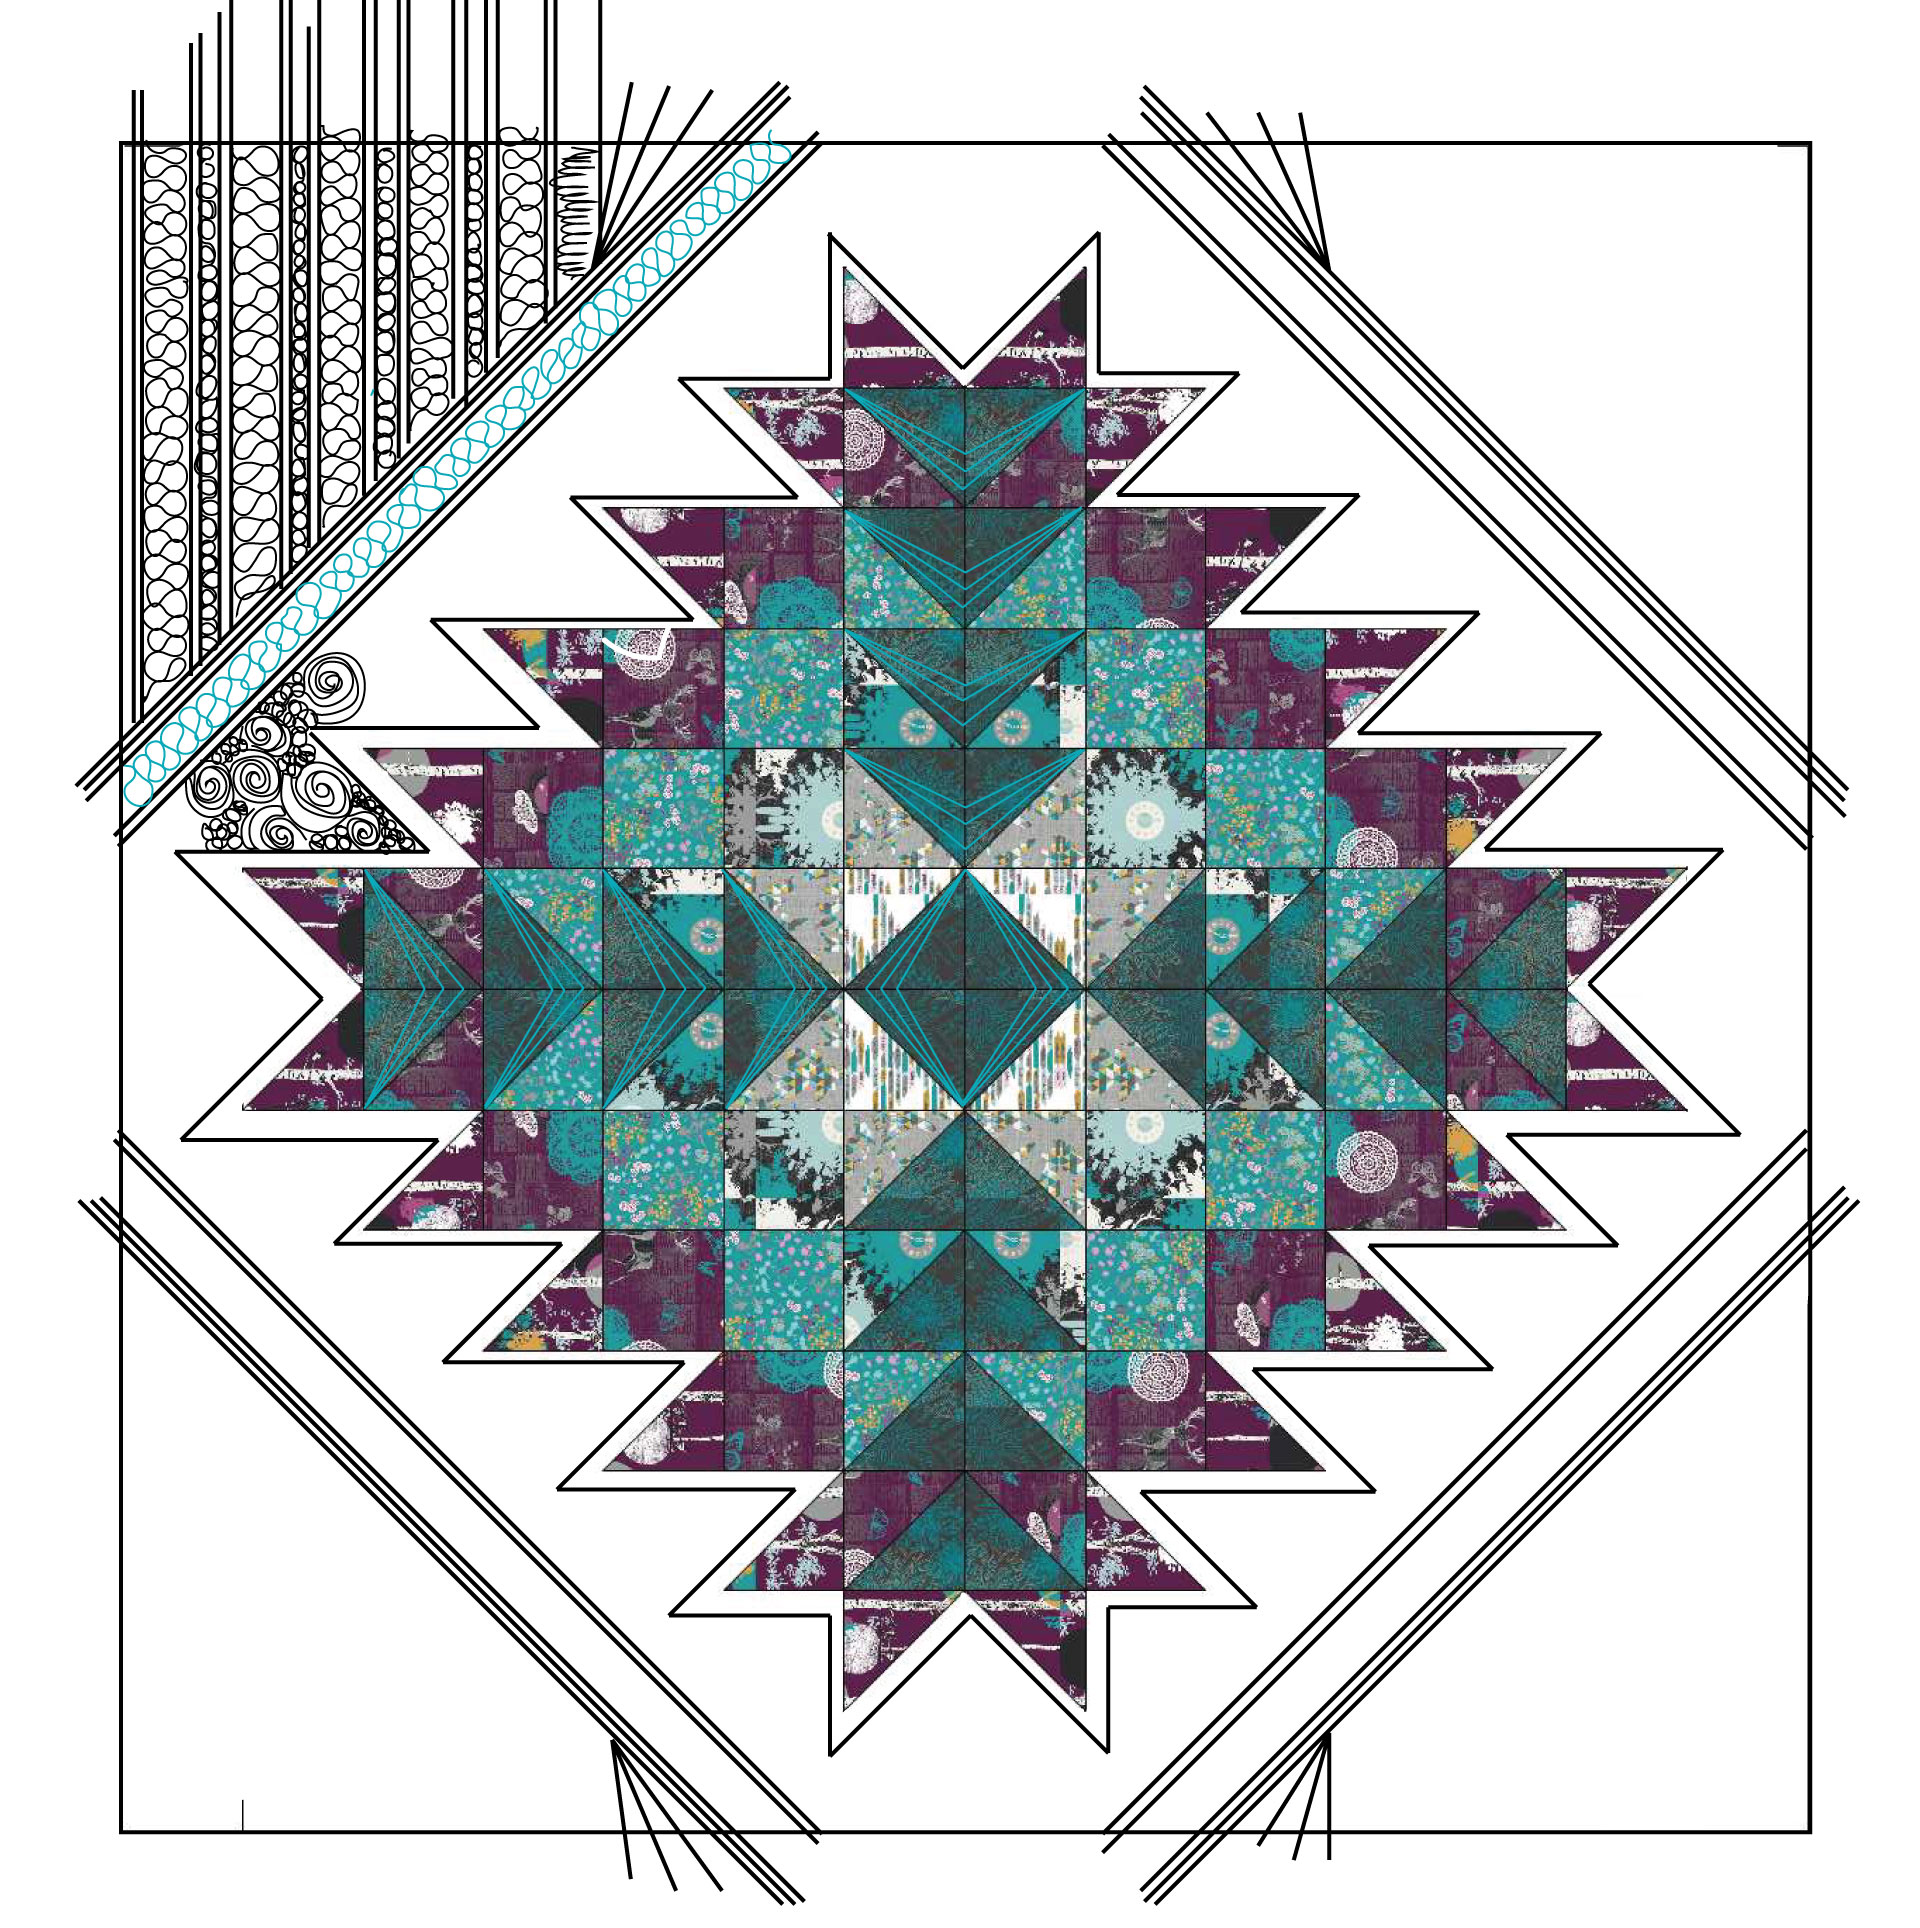
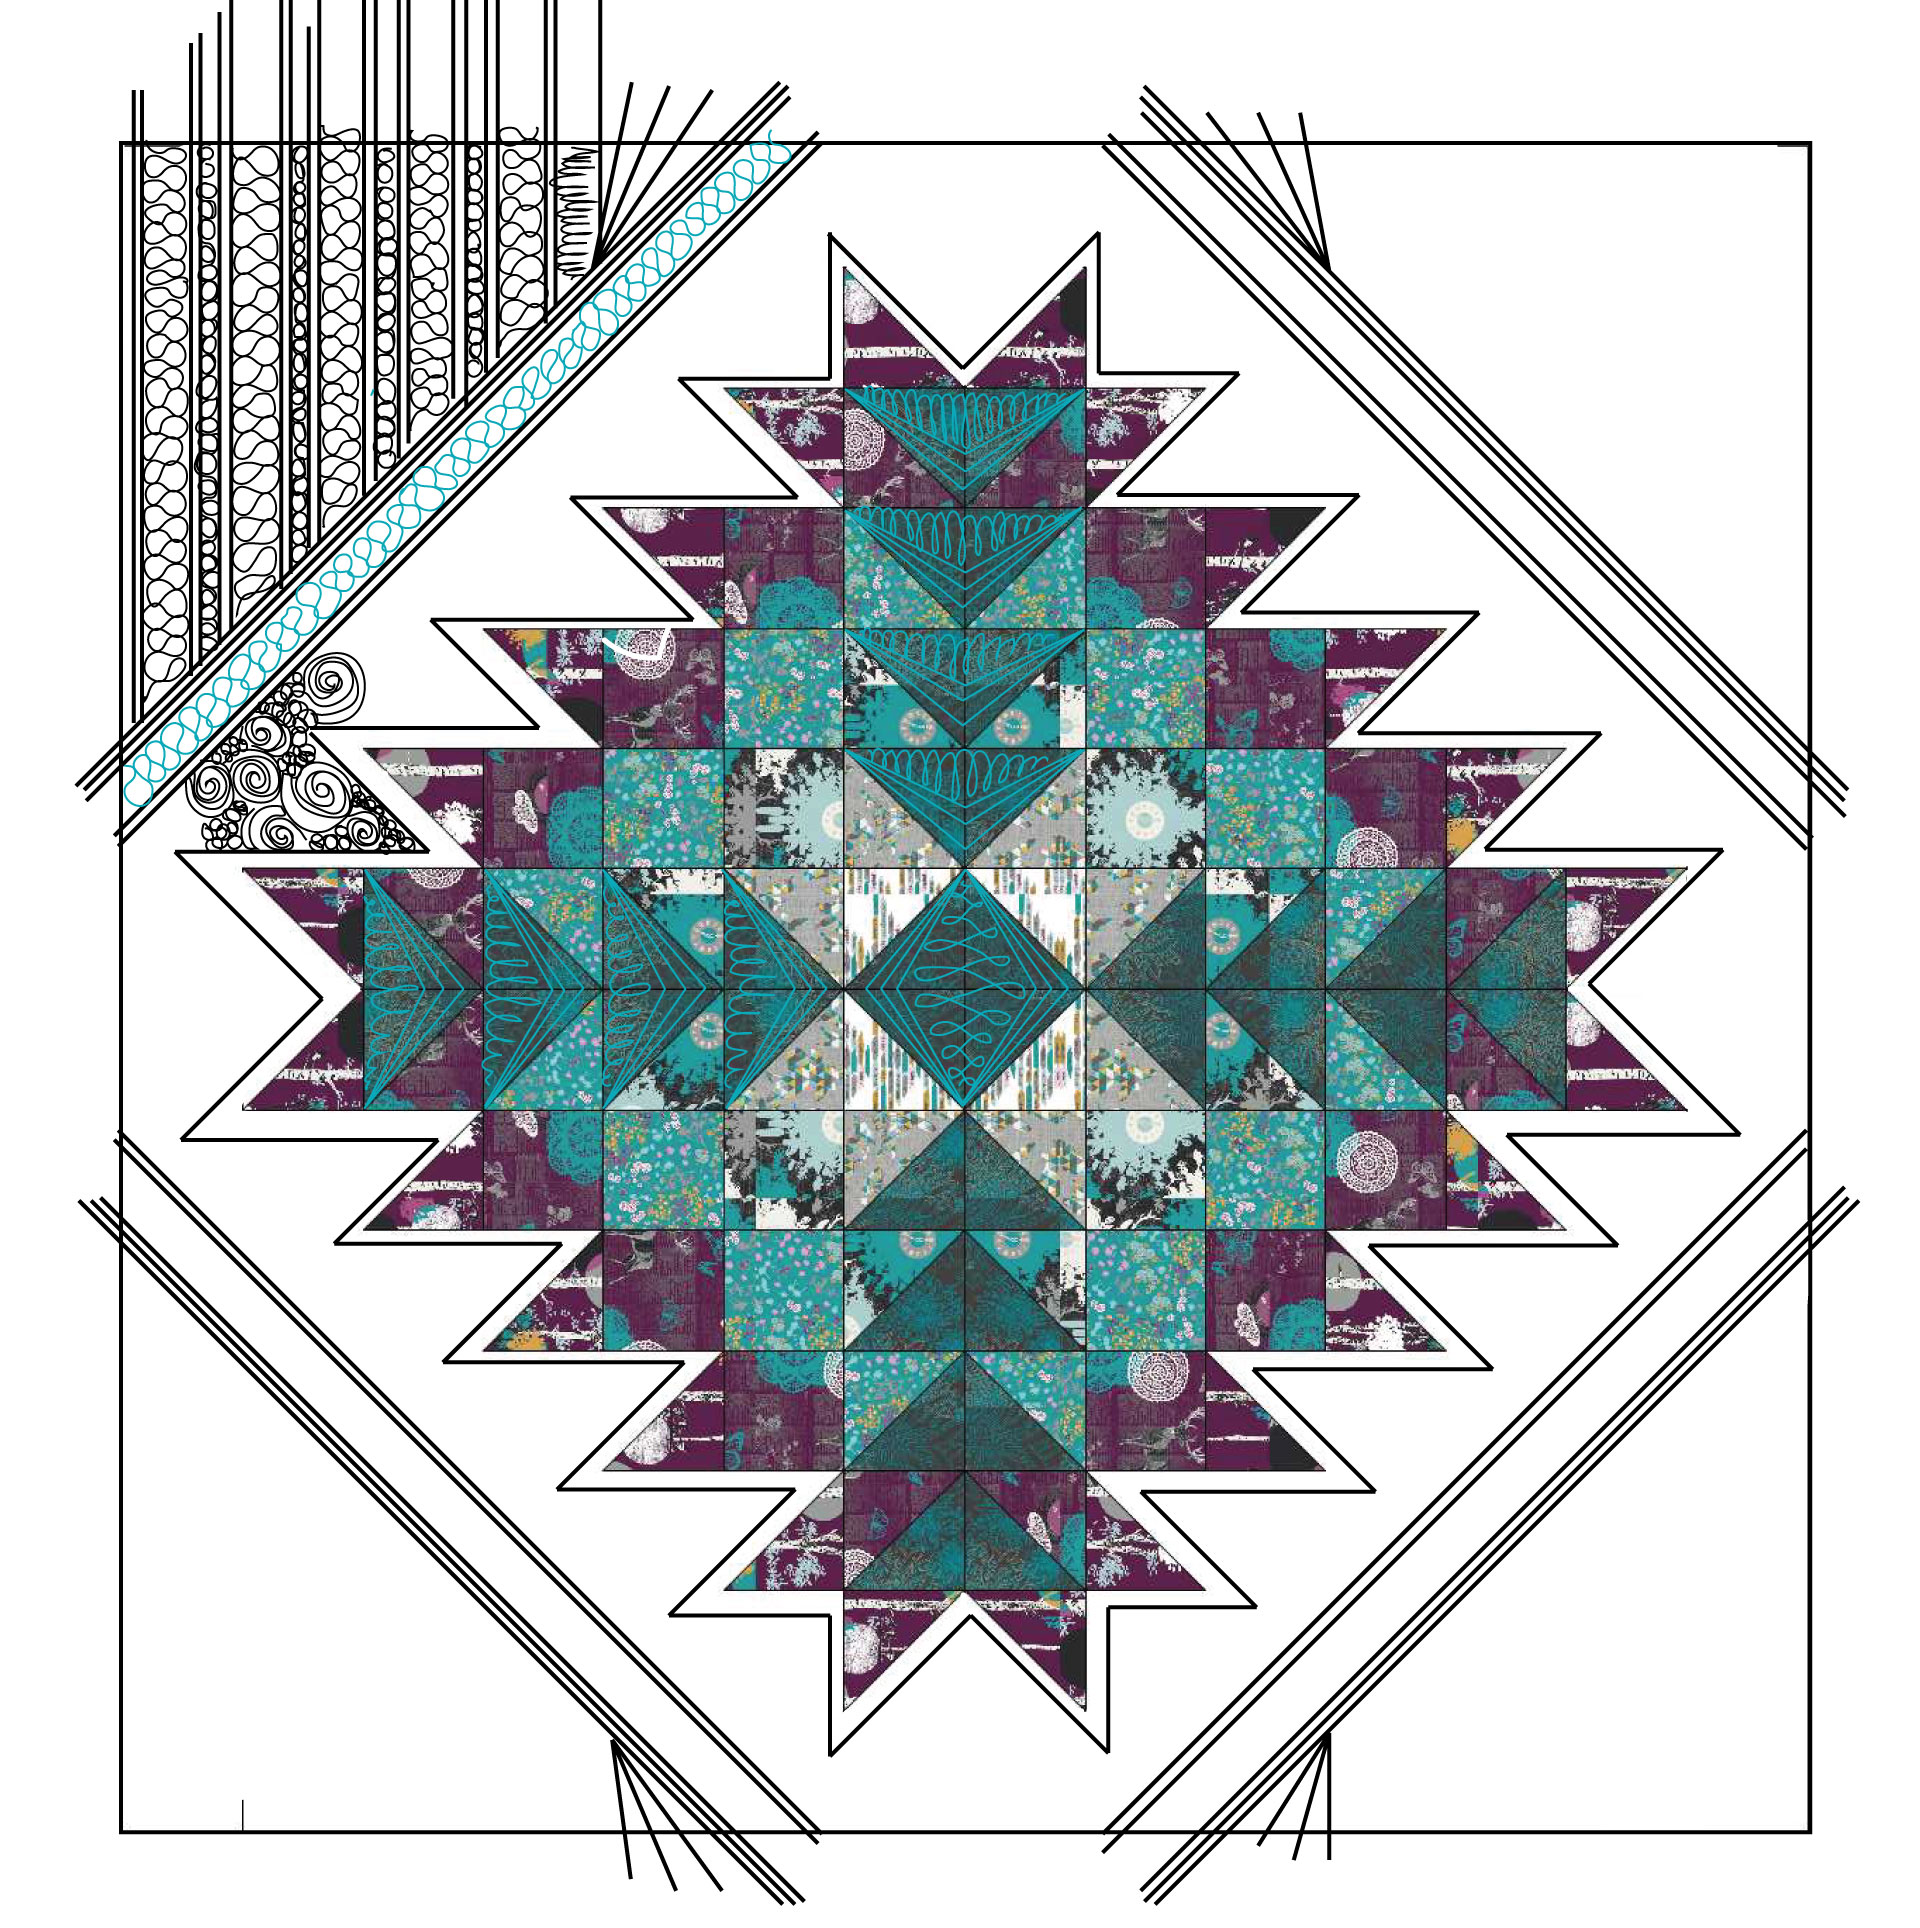
I started by echo quilting around the center medallion, 1/4" away from the piecing.
Then I added a diagonal line 1" away from the points on my medallion -- I took a ruler, lined up the 1" with the points, and marked this line. I then echoed 1/4" away from that, then 1 1/2" away from that one, then two 1/4" lines again.
This was the most complicated step... I started by doing some dot to dot quilting in the top-outer-center. I actually meant for this to be INSIDE the diamond, but that didn't quite work out, so they ended up outside. Then I marked lines straight up and down in the following pattern: 1st line, 1/4" away, 2" away, 1/4" away, 1/2" away, and repeating... basically alternating 1/2" and 2" lines, but each echoed with a 1/4" line in between. I think it will make more sense in the next step...
... where I filled the 2" lines with ribbon candy and the half inch lines with bubbles. So there is a line of 2" ribbon candy, a 1/4" gap, a 1/2" line of bubbles, a 1/4" gap, a 2" ribbon candy, a 1/4" gap... etc. The diagram only shows this in one quarter, but I repeated this in all the corners.
Next I filled the center portion with a swirl & dot filler (often called seafoam). Though this could easily be changed to whatever your favorite filler is.
Then (and this was a big step for me) I filled the 1 1/2" diagonal gap with ribbon candy. WITH A CONTRASTING THREAD. It has been a long time since I used contrasting thread. As I was doing it, I was like "wow, this is such a big step for me," only to remember that up until about a year and a half ago I almost always used contrasting thread. Sigh. The other secret about this one is that I actually forgot that I wanted to stitch this in contrasting thread, and got the first 2 lines done before I remembered.... so I just stitched over top of my white lines with blue. Because I am way to lazy to pick all that out.
I then did some dot to dot in my flying geese... it's a little hard to see in the diagram, but I went from the outer corners of my geese, to 1/2" in from the pointy part of the goose, then to the other corner, then back to the center only 1/2" away from the last line of stitching, back to the corner, and etc.
Then I did some loops under these lines in the geese.
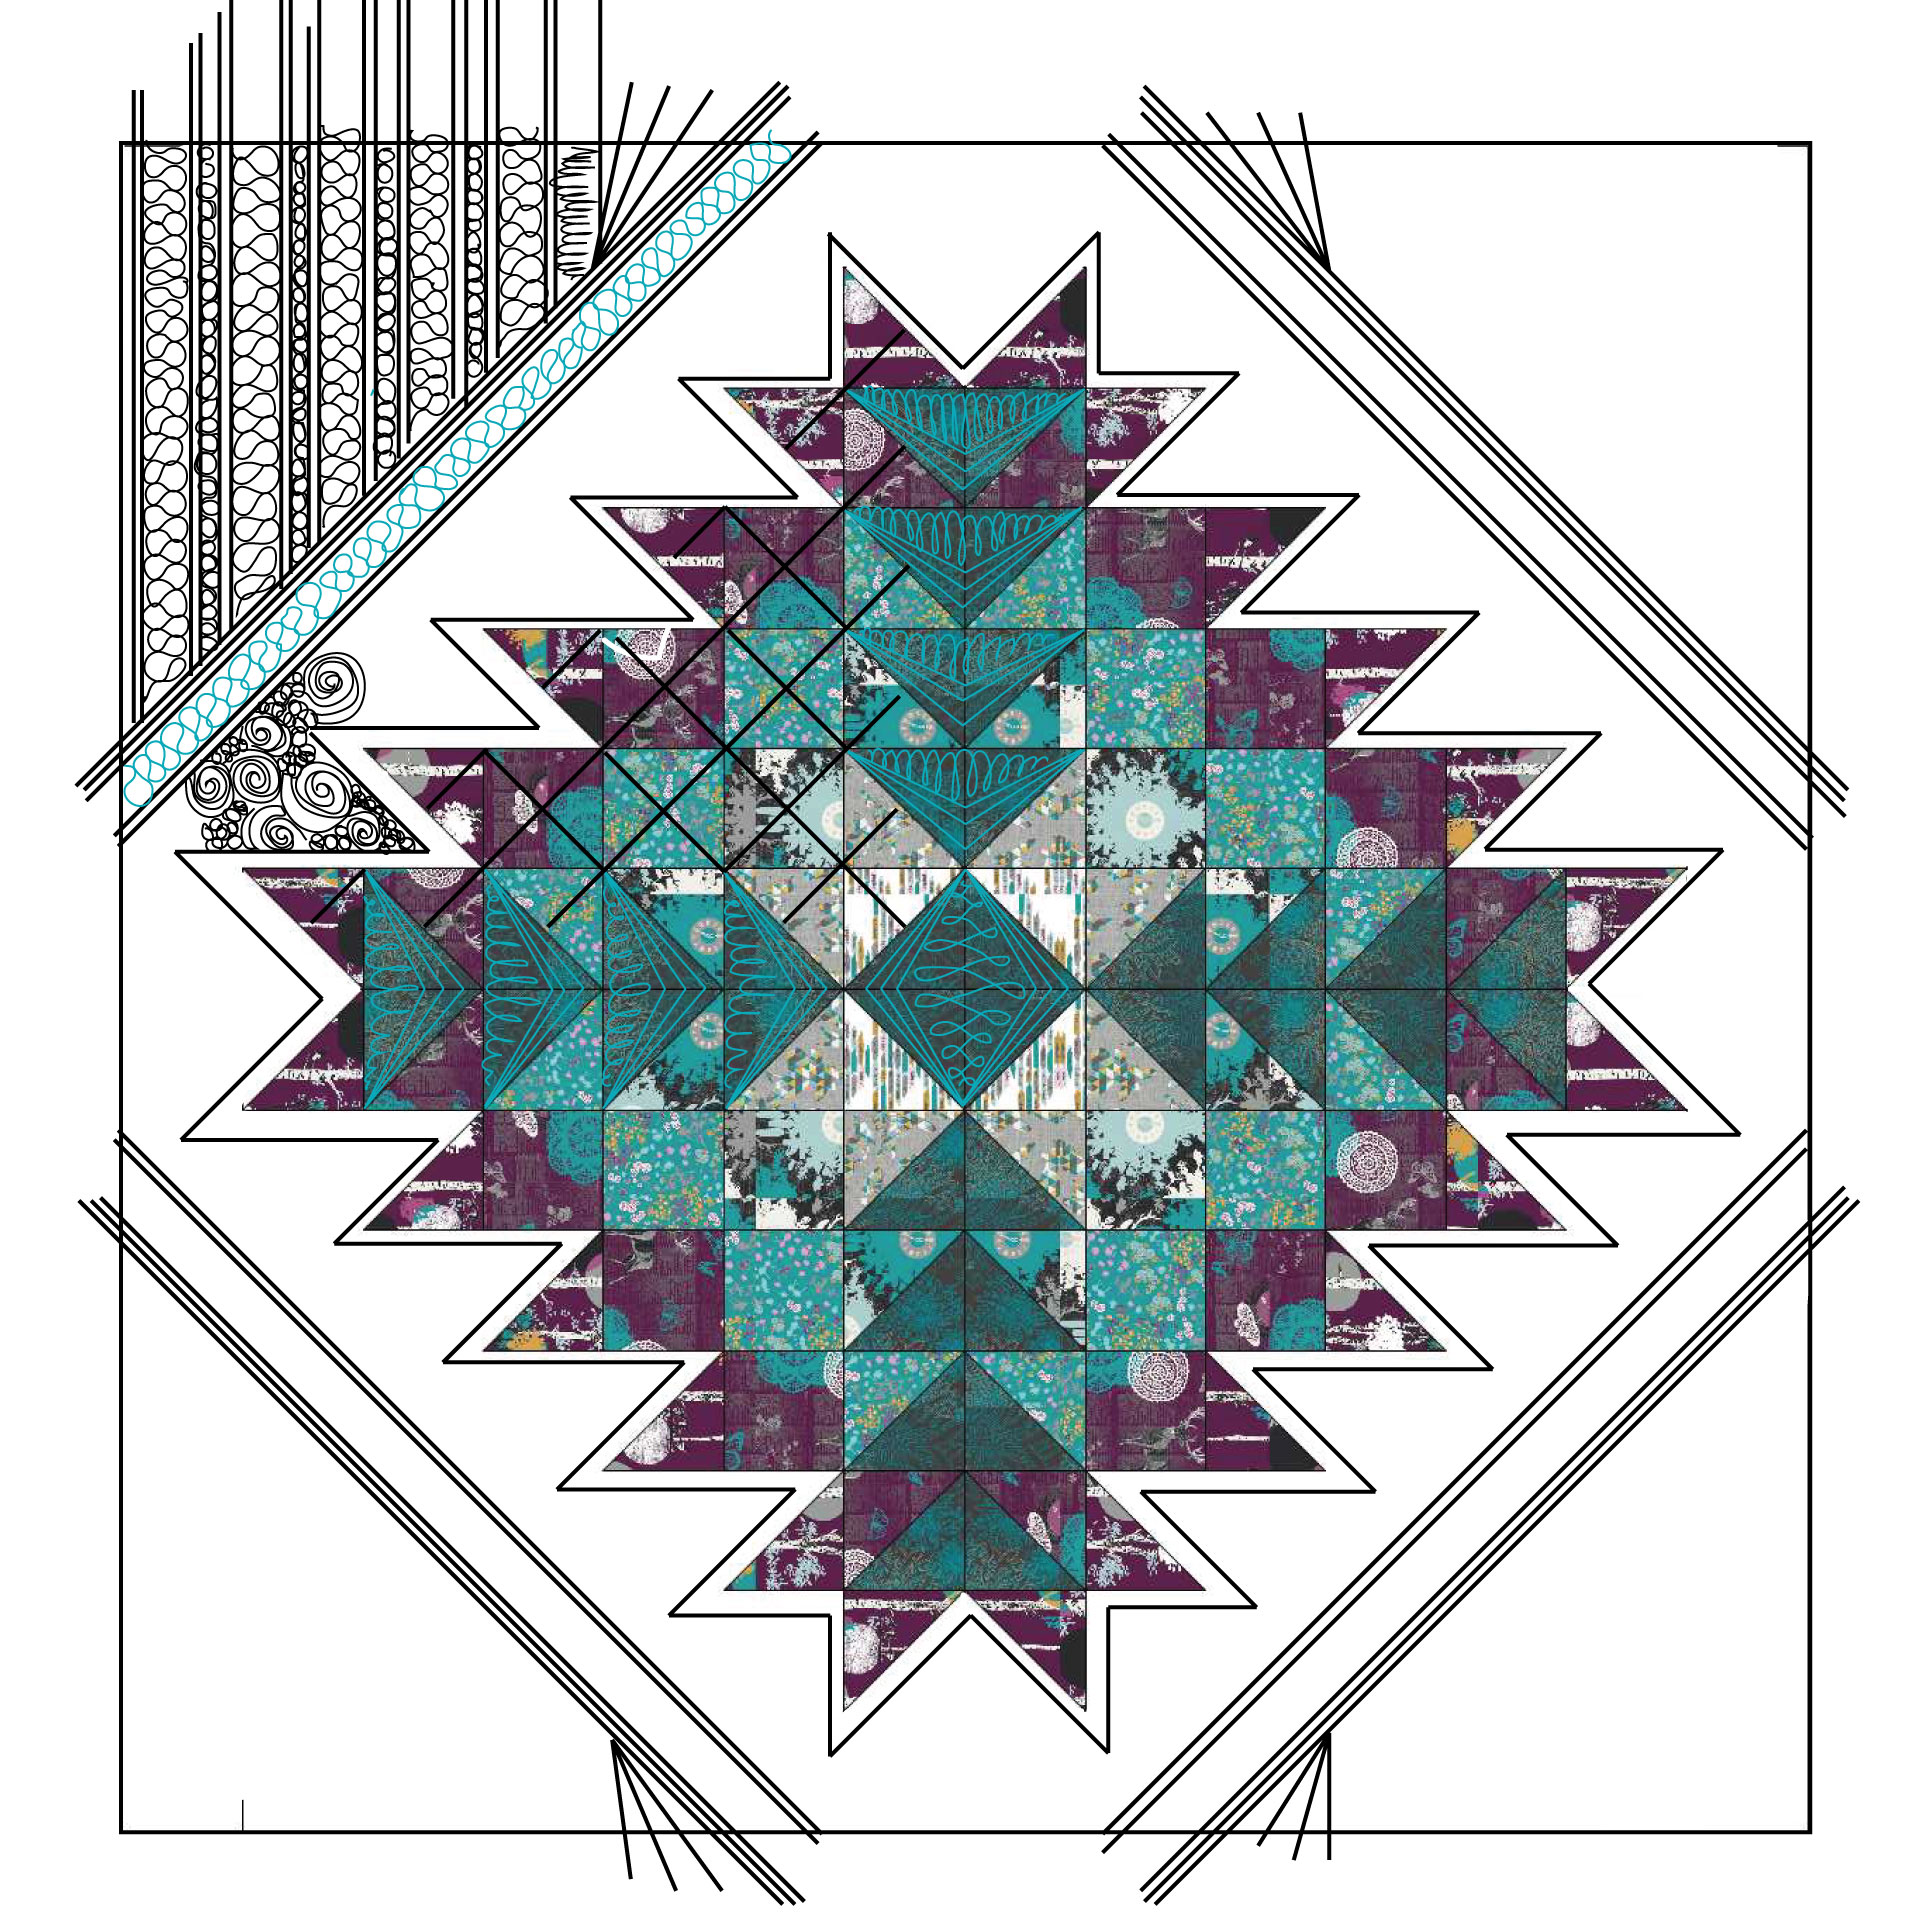
Then I did a cross hatch in the rest of the medallion -- this was really easy to do, as I just went from corner to corner of each little square.
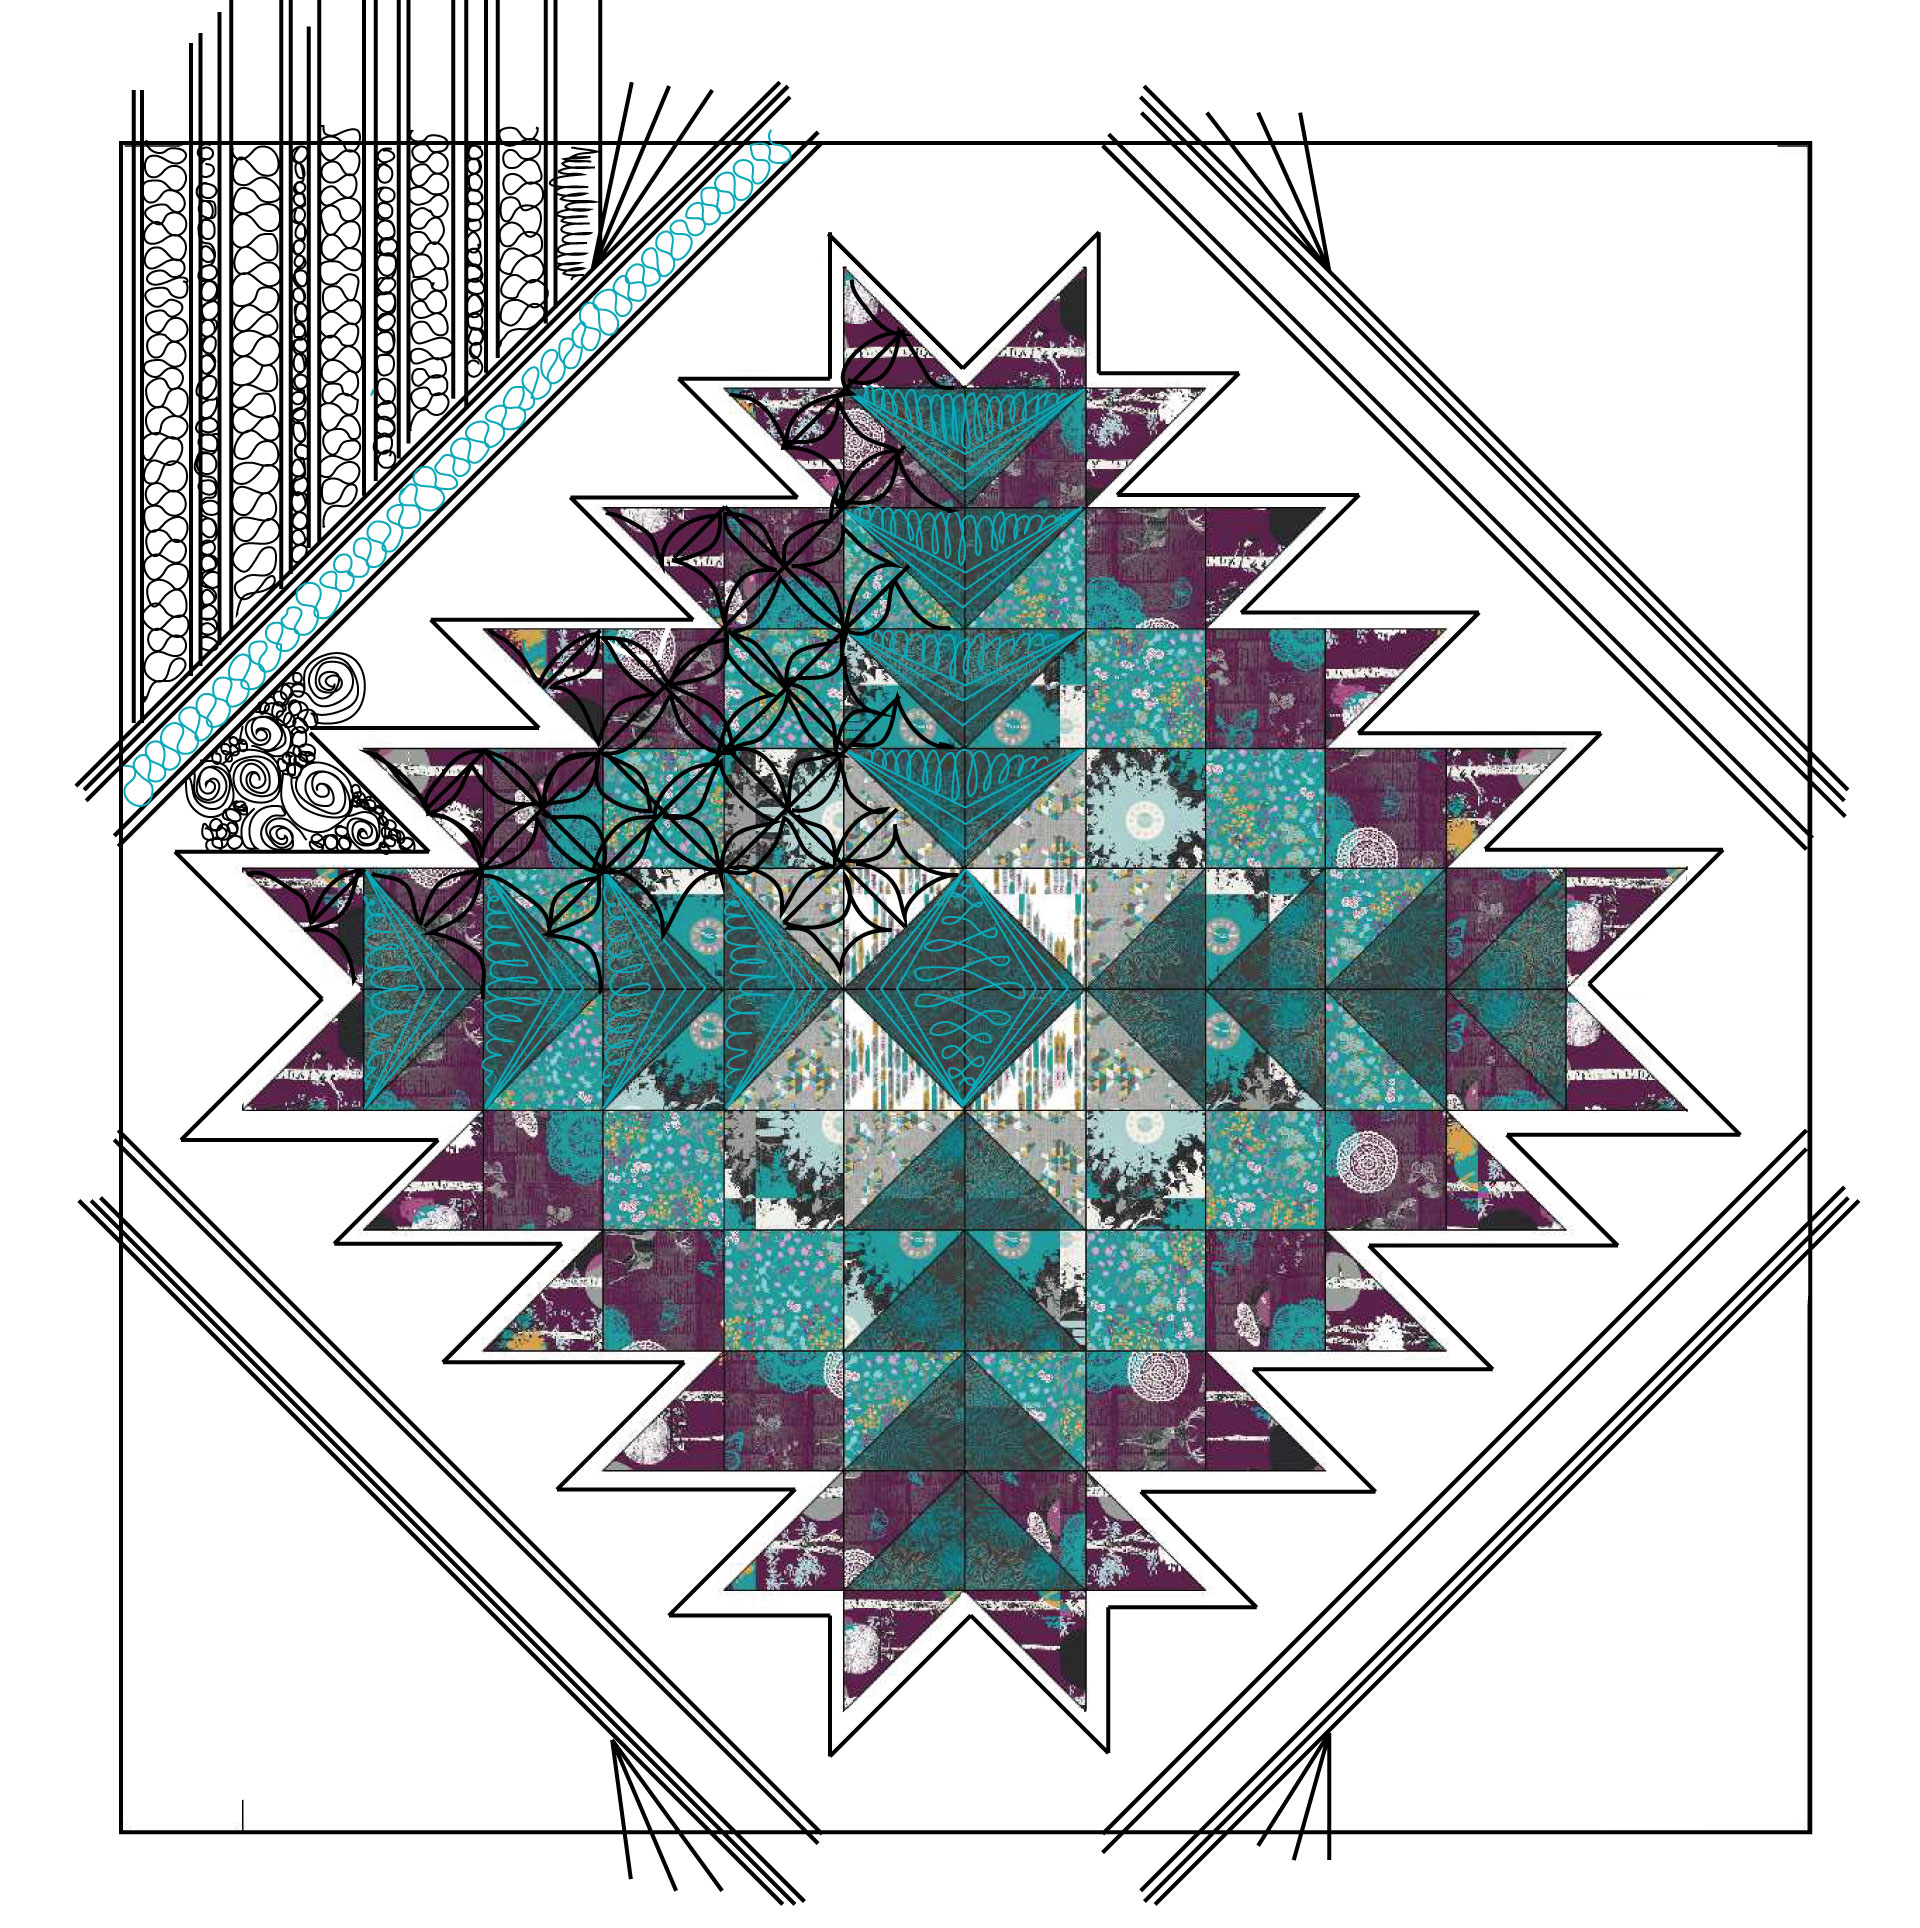
I then did some continuous curve around this grid-- basically just a little bump from corner to corner of each square. I love the continuous curve, and love to do it A LOT. You can see it on my Peaks and Valleys quilt HERE.
Anyways, that's it for this week! Remember, if you want your quilt to be part of Free Motion Friday (like JUDY did) email kathleen (at) kathleenquilts.com
Later days,
Kathleen.
